The Oreo pie is more than just a dessert; it's a nostalgic journey wrapped in a delightful combination of crunchy cookie crust and creamy, decadent filling. Universally loved for its irresistible taste and often no-bake simplicity, this iconic treat has earned its place in countless kitchens and hearts around the world. Whether you're a seasoned baker or a complete novice, the allure of a homemade Oreo pie is undeniable, promising a rich, satisfying experience with every forkful.
From its humble beginnings, leveraging the immense popularity of the Oreo cookie itself, the Oreo pie has evolved into a versatile dessert that can be customized to suit any palate or occasion. Its straightforward preparation often makes it a go-to choice for potlucks, family gatherings, and spontaneous sweet cravings. This article delves deep into the world of Oreo pies, exploring everything from foundational recipes to innovative variations, ensuring your next creation is nothing short of spectacular.
The Anatomy of a Perfect Oreo Pie: Crust, Filling, and Topping
At its core, a quintessential Oreo pie is a symphony of three distinct, yet harmonious, layers. Understanding each component is key to crafting a balanced and delicious dessert.
1. The Irresistible Oreo Crust
The foundation of any great Oreo pie is its crust. Typically, this is made from crushed Oreo cookies blended with melted butter, creating a sturdy yet crumbly base that perfectly complements the creamy filling. But did you know there are subtle nuances to perfecting it?
- Classic Method: Roughly 25-30 Oreo cookies (with their cream filling) pulsed in a food processor until fine crumbs, then mixed with 1/2 cup of melted unsalted butter. Press firmly into a 9-inch pie plate.
- No-Bake Firmness: For an extra firm crust that won't crumble upon slicing, consider baking it for 8-10 minutes at 350°F (175°C) before chilling, even for "no-bake" pies. This helps to set the butter and cookie crumbs.
- Flavor Variations: While classic Oreos are standard, experiment with different Oreo flavors like Golden Oreos for a vanilla crust, or even chocolate wafers for a deeper cocoa note. Some enthusiasts swap a tablespoon or two of butter for a splash of milk or a binding agent like cream cheese for a richer crust.
A well-made crust should be firm enough to hold its shape but tender enough to cut through easily, providing that signature chocolatey crunch.
2. The Creamy, Dreamy Filling
This is where the Oreo pie truly comes to life, offering endless possibilities for flavor and texture. The most popular fillings often revolve around a few key ingredients:
- Cream Cheese Base: A mixture of softened cream cheese, powdered sugar, and whipped cream (or whipped topping) creates a tangy-sweet, incredibly smooth, and stable filling. This is a robust choice that holds up well.
- Pudding Base: Instant chocolate or vanilla pudding mixed with milk, then folded into whipped cream or whipped topping, results in a lighter, airier filling. This method is incredibly quick and yields a very satisfying no-bake oreo pie.
- Ice Cream Base: For a frozen delight, softened vanilla or chocolate ice cream, often mixed with crushed Oreos, makes a wonderfully refreshing Oreo pie, especially during warmer months.
- Custard/Mousse Base: More elaborate recipes might feature a homemade chocolate custard or a light chocolate mousse, folded with additional crushed Oreo pieces for texture.
The key to a great filling is balancing sweetness with the richness of the dairy and, of course, incorporating enough crushed Oreos to maintain that iconic cookie flavor and texture throughout.
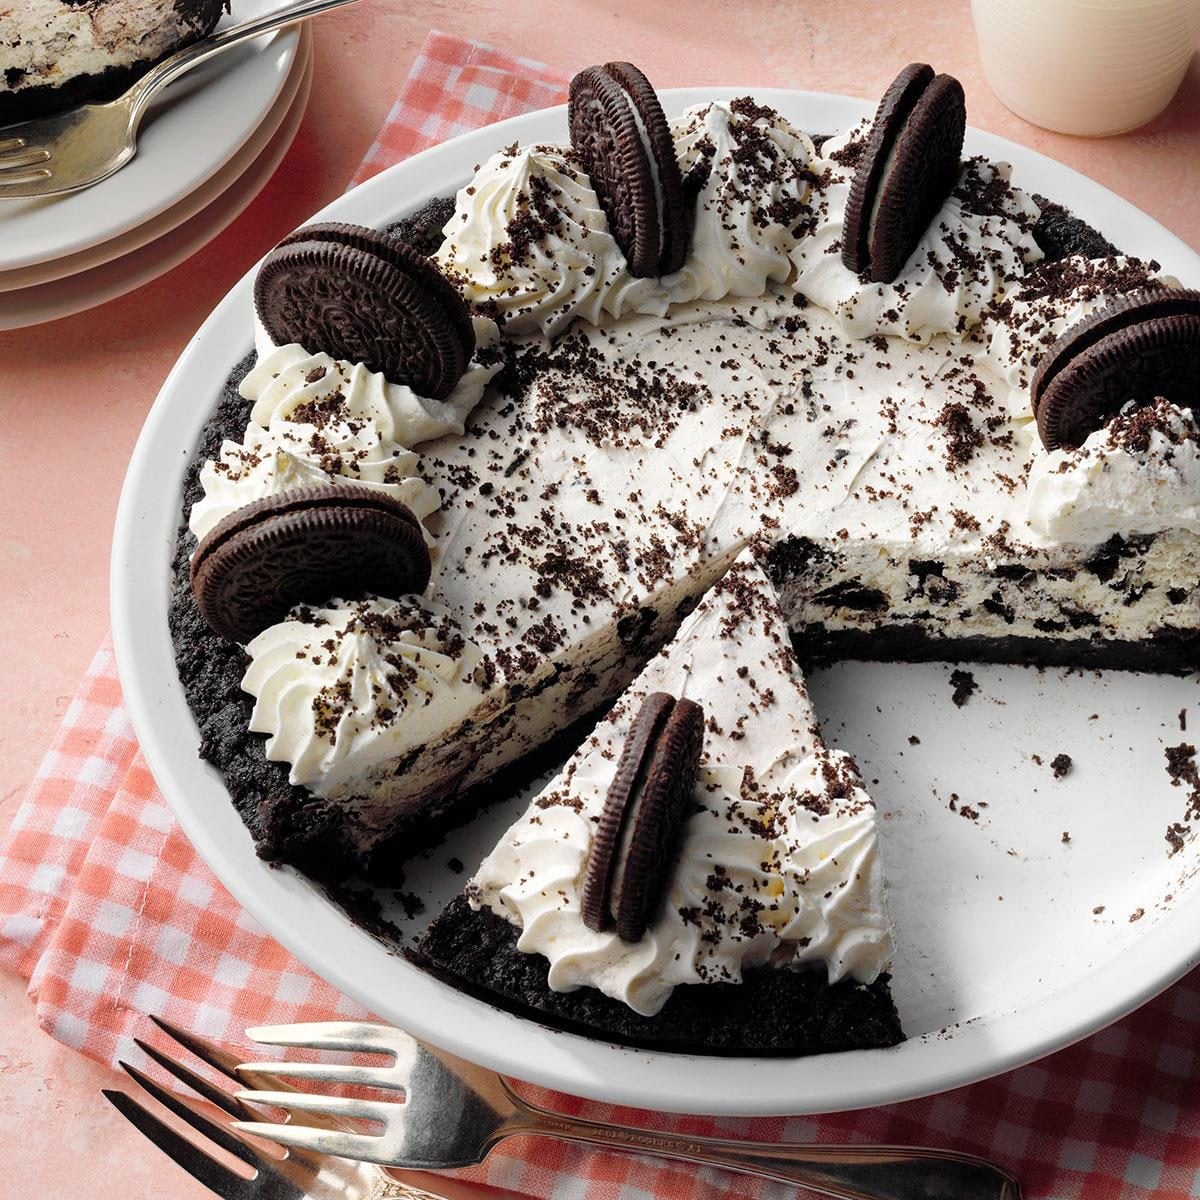
3. The Finishing Touch: Toppings Galore
A pie isn't complete without its crown. The topping not only adds visual appeal but also contributes another layer of flavor and texture.
- Classic Whipped Cream: Freshly whipped cream, lightly sweetened, is the quintessential topping. Its lightness provides a perfect contrast to the rich filling.
- Chocolate Shavings or Drizzle: A sprinkle of dark chocolate shavings or a generous drizzle of chocolate syrup elevates the presentation and intensifies the chocolate experience.
- Mini Oreos or Extra Crumbles: For an undeniable declaration of its identity, adorn your Oreo pie with mini Oreo cookies or a handful of extra cookie crumbles.
- Fruit or Nuts: For a fresh twist, consider berries like raspberries or strawberries, or a sprinkle of toasted pecans or almonds, especially if they complement your filling flavor.
No-Bake Wonders: Why Oreo Pie Reigns Supreme for Ease and Speed
One of the most compelling reasons for the enduring popularity of the Oreo pie is its incredible accessibility, particularly its no-bake variations. This makes it a fantastic dessert for virtually anyone, regardless of their baking prowess.
The Allure of No-Bake Desserts
In a world where time is a precious commodity, a dessert that requires minimal effort and no oven time is a true hero. No-bake Oreo pies are perfect for:
- Beginners: The simple steps involve crushing cookies, mixing ingredients, and chilling, making it a perfect entry point into the world of baking (or rather, no-baking!).
- Busy Schedules: When you need a show-stopping dessert but are short on time, a no-bake Oreo pie can be assembled in under 30 minutes, leaving only chilling time to perfect its structure.
- Hot Weather: Avoiding the oven in summer is a huge plus. A chilled, creamy Oreo pie is incredibly refreshing on a warm day.
- Kids and Families: It's a fun and safe recipe to make with children, as there's no hot oven involved. Kids love helping to crush cookies and mix the filling.
Tips for Speedy Assembly and Perfect Chilling
- Prep Ahead: Crush your Oreos for the crust ahead of time. You can even make the crust and chill it while you prepare the filling.
- Soften Ingredients: Ensure cream cheese is at room temperature for a lump-free filling.
- Chill Time is Crucial: While assembly is quick, don't skimp on the chilling. A minimum of 4 hours, and preferably overnight, allows the pie to firm up completely, making for clean slices and a stable structure. This is perhaps the most important "step" in any no-bake pie.
- Use a Springform Pan: For an impressive presentation and easy slicing, consider assembling your Oreo pie in a springform pan. Line the bottom with parchment paper for effortless transfer.
The efficiency of a no-bake Oreo pie doesn't compromise on flavor; instead, it proves that sometimes, the simplest methods yield the most satisfying results.
Beyond the Basics: Creative Variations and Customizations for Your Oreo Pie
While the classic Oreo pie is a masterpiece in itself, its versatility lends itself beautifully to endless customizations. Don't be afraid to experiment and create your signature version!
Flavor Profile Enhancements
The beauty of the Oreo pie lies in its ability to adapt to various flavor combinations:
- Mint Oreo Pie: Add a few drops of peppermint extract to a cream cheese or whipped cream filling, and garnish with Andes mints or chocolate mints.
- Peanut Butter Oreo Pie: Incorporate creamy peanut butter into your cream cheese filling. This creates a rich, salty-sweet dynamic that's incredibly addictive. Top with chopped peanuts or peanut butter cups.
- Mocha Oreo Pie: Dissolve instant espresso powder in a touch of hot water and add it to your chocolate or cream cheese filling for a sophisticated coffee kick.
- Strawberry Oreo Pie: Fold in fresh, diced strawberries or strawberry puree into a vanilla-based filling. A nice contrast with the chocolate crust.
- Caramel Drizzle: A generous swirl of salted caramel sauce over the filling before chilling, or as a topping, adds a luxurious touch.
Texture and Ingredient Additions
Introduce new textures to elevate your pie experience:
- Candy Bar Mix-ins: Chop up your favorite chocolate candy bars (e.g., Snickers, Butterfinger) and fold them into the filling.
- Nutty Crunch: Toasted pecans, walnuts, or almonds can be added to the filling or sprinkled on top for an extra layer of crunch.
- Chocolate Chips: Mini chocolate chips or white chocolate chips mixed into the filling provide bursts of chocolatey goodness.
Dietary and Presentation Innovations
The Oreo pie can also be adapted for specific dietary needs or presented in novel ways:
- Vegan Oreo Pie: Use "accidentally vegan" Oreos (check labels), plant-based butter, dairy-free cream cheese, and vegan whipped topping (like coconut cream whipped).
- Gluten-Free Oreo Pie: Many brands now offer gluten-free chocolate sandwich cookies that work perfectly for the crust. Ensure all other ingredients are certified GF.
- Mini Oreo Pies: Prepare the pies in individual ramekins, muffin tins (lined with cupcake wrappers), or small dessert glasses for portion control and elegant serving.
- Oreo Pie Bars: Press the crust into a square baking dish, add the filling, chill, and then cut into bars for easy grab-and-go servings. Perfect for parties!
Whether you're making a simple, classic oreo pie or a highly customized gourmet version, the joy lies in the creative process and, of course, the delicious outcome.
Perfecting Your Oreo Pie: Expert Tips for Success and Presentation
While the Oreo pie is famously forgiving, a few expert tips can elevate your dessert from good to absolutely phenomenal, ensuring every slice is perfect.
Achieving Optimal Texture and Flavor
- Don't Over-Process the Crust: While you want fine crumbs, avoid turning them into a paste. A slightly coarser crumb can add a pleasant texture.
- Cream Cheese Consistency: Always use softened cream cheese for the filling. Cold cream cheese will result in lumps, no matter how much you beat it. Take it out of the fridge at least 30 minutes to an hour before you start.
- Whip Your Cream Properly: If using fresh whipped cream, ensure it's whipped to medium-stiff peaks before folding it into the filling. Over-whipped cream can become grainy, while under-whipped cream won't provide enough structure.
- Taste and Adjust: Before pouring your filling into the crust, taste a small spoonful. Does it need more sweetness? A pinch of salt to balance? A drop more vanilla? Adjust as necessary.
- Prevent a Soggy Crust: While a no-bake crust is generally sturdy, overly wet filling or insufficient chilling can lead to a slightly soggy bottom over time. Ensure your filling isn't too liquidy and chill thoroughly.
Presentation and Serving Pointers
- Chill for Clean Slices: As mentioned, proper chilling is paramount. A well-chilled pie will slice cleanly, giving you those perfect Instagram-worthy wedges. Dip your knife in hot water and wipe clean between each slice for the neatest cuts.
- Garnish Just Before Serving: While some garnishes like chocolate shavings can be added early, fresh whipped cream or delicate fruit should be added just before serving to maintain their freshness and appearance.
- Serve Chilled: Oreo pies are best served cold, straight from the refrigerator. This keeps the filling firm and refreshing.
- Storage: Store leftover pie, covered, in the refrigerator for up to 3-4 days. While it might last longer, the crust can soften over time.
With these tips in mind, you're well on your way to creating an Oreo pie that not only tastes incredible but also looks professionally made.
The Oreo pie is a true testament to the power of simple ingredients coming together to create something extraordinary. Its combination of delightful crunch, creamy sweetness, and endless customization options makes it a perennial favorite for good reason. Whether you stick to the beloved classic or venture into exciting new flavor territories, the joy of crafting and sharing an Oreo pie is a timeless pleasure. So go ahead, grab your favorite Oreos, and get ready to whip up a dessert that will undoubtedly bring smiles to everyone's faces.
